 |
| The Inspiration |
 |
| Mock Up |
could customize it to something even better. I put together a mock up on my computer (pic to right).
I bought a piece of 60x40 foamcore at Office Depot for about $16 and cut out the middle. I bought some cheap acrylic paints and after a color adjustment, I painted the whole thing. Hubby built a frame with mitered corners (he sure does love his power tools) and metal L brackets and we used nail glue to attach the foamcore to the wood. We let it sit overnight with my cook books all over it to weigh it down.
 |
| Carnival Pink on right was chosen |
After that I had to figure out how to do the zebra print. I had never done zebra print and am a little uncomfortable with stuff that is free-flow. I am a follow the directions and straight edges kind of crafter typically. I thought about painting them but figured I would never get it the way I wanted so I decided (after much googling) that cutting out random black lines and then mod podging them on would be the best answer. If you don't know what Mod Podge is, learn now, it is a crafting must! It is like glue and can be found at any craft stores and even Walmarts that have a craft section. I choose to use one with a matte finish.
 |
| Frame painted before wood framing was added to it |
 |
| Zebra Print Start |
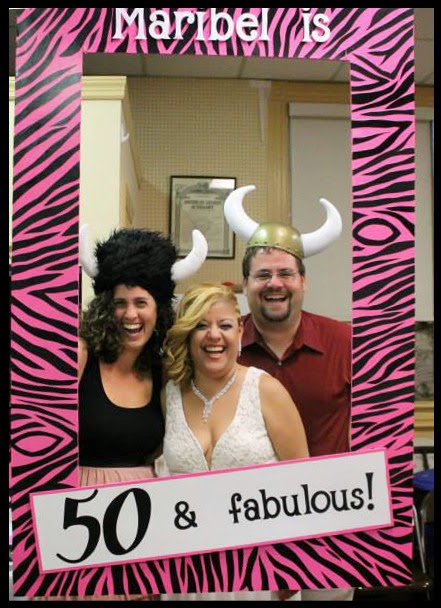
After gluing everything down and putting a layer of glue over it. I waited for it to dry overnight and then turned it upside down to cut off all those extra ends sticking out. I used some of the leftover middle section of the frame and cut out the bottom piece. I painted the same color pink around the edges and then used my handy dandy Cricut to cut out the letters and mod podged them on. I then used the mod podge to attach the bottom sign to the frame. Finally I used my Cricut to cut out the white letters on top and gave them a raised appearance by gluing small pieces of foamcore underneath. And Voila! The frame was done.
 |
| Entire frame with paper laid out before it was glued down |
We transported to the party location in the back of a friend's pick up truck (thank goodness for good weather) and hung it using some gadget my friend had that is made for hanging on hung ceilings. She said she bought it at Home Depot. Sorry I don't know the details. It looked great. I provided a ton of my fun Halloween stuff and we had a great photo booth!
I hope this inspires you to make something zebra print in any two colors you choose or create your own photo frame. If you can't hang it you could create a stand for it or put hooks on the top and hang it with fishing line or even some kind of handles. You could customize it for a wedding or any affair. Think of all the things you could do!
 |
| Me, the Hubby and the birthday girl with our viking helmets and a good laugh! |
Zebra Photo Frame
 Supplies:
Foamboard
Acrylic paint for background color
1x1 pine boards
(4) metal L brackets and screws
Mod Podge
Black Paper
Wood Glue
Tools:
Saw
X-Acto Knife
Paintbrush
Scissors
Cricut (optional)
Long ruler
Pencil
Screwdriver or drill
Something to weigh done the frame
1x1 pine boards
(4) metal L brackets and screws
Mod Podge
Black Paper
Wood Glue
Tools:
Saw
X-Acto Knife
Paintbrush
Scissors
Cricut (optional)
Long ruler
Pencil
Screwdriver or drill
Something to weigh done the frame
Directions:
- Mark where the frame will be cut out using pencil and ruler
- Cut out middle of frame using an x-acto knife and a sawing motion
- Paint frame
- Cut 1x1 boards to the size of the outside edges of the frame
- Attach 1x1 boards together using L brackets
- Attach foamboard frame to wood frame with wood glue. Allow to sit for 4-8 hours to dry with weights on top.
- Add accents by randomly cutting out black stripes and laying out on frame
- Attach stripes with mod podge
- Apply a layer of mod podge over entire frame
- Create letters and accents with Cricut or hand cut
- Attach to frame with mod podge

No comments:
Post a Comment